Tour guide system user guide
The devices arrive charged and set up. With this guide your group is ready to go in five minutes, no technician needed.
What is in the case
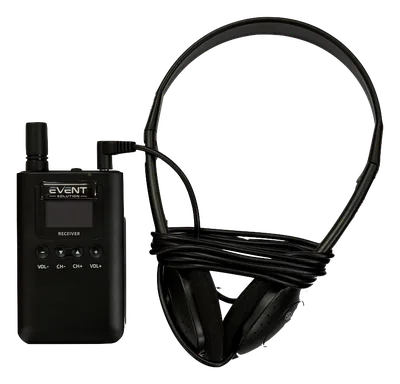
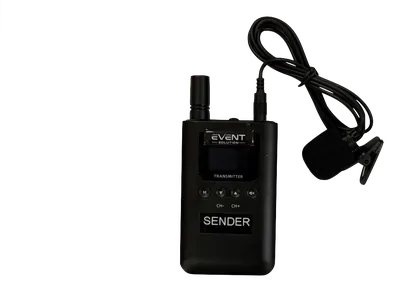
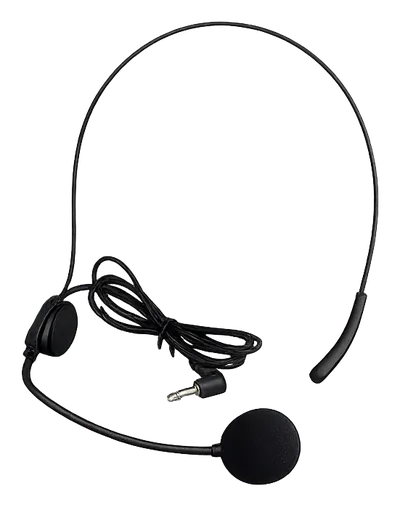
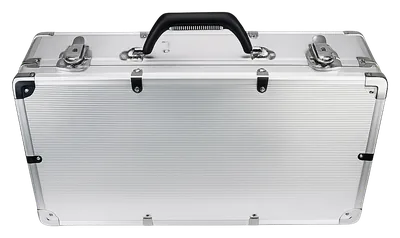
The charging case holds 30 receivers and 2 transmitters. If the devices are shipped, the return label is enclosed. Every receiver and every transmitter sits in its own slot, so when you pack up you can see straight away whether everything is there.
The devices
- Switch: ON, LOCK, OFF
- Socket for headset or lapel microphone
- Display with channel, battery and signal
- Buttons: M (set up receivers), CH− and CH+ (channel), mute
- Switch: ON, LOCK, OFF
- Socket for the headphones
- Display with channel, battery, signal and volume
- Buttons: VOL− and VOL+ (volume), CH− and CH+ (channel)
Transmitter and receiver look almost the same. You can recognise the transmitter by the “SENDER” sticker and by the socket for the microphone. Below the display, each device also has “TRANSMITTER” or “RECEIVER” printed in small letters. The switch on top has three positions: ON (on), LOCK (on, buttons locked) and OFF (off).
Getting started
1. Switch on the transmitter and plug in the microphone
Plug the headset or the lapel microphone into the socket on top of the transmitter and slide the switch to ON. The display shows the channel, for example “CH 001”.
The headset is the better choice outdoors, in noisy places and when you move around a lot, because the microphone always stays the same distance from your mouth. Clip the lapel microphone to your collar about a hand’s width below your chin.
2. Switch on the receiver
Plug in the headphones, slide the switch to ON. The receiver shows its channel. If it shows the same number as the transmitter, you hear the voice straight away.
3. Set the volume
With VOL+ and VOL− on the receiver. The volume goes from 0 to 9 and is back at 4 every time you switch the receiver on.
4. Lock it so nothing gets changed
Slide the switch to LOCK. The device stays on, but the channel buttons are locked. On the receiver you can still adjust the volume while it is locked. This is handy when you hand out the receivers to the group.
5. Mute for a moment
On the transmitter, the button with the crossed-out loudspeaker mutes the microphone, for example for a quick private word with someone. A symbol appears on the display. Press it once more and the group hears you again.
Changing channels and several groups
There are 999 channels. Use CH+ and CH− to change the channel: a short press for one step, a long press for steps of ten. Transmitter and receiver must be on the same channel.
If you guide several groups at the same time, each group gets its own transmitter on its own channel. That way the tours do not interfere with each other, even when the groups are close together. We set up the devices for you if you list the groups in the note with your request.
Setting up many receivers at once
If a receiver is on the wrong channel, this is the quickest way:
- On the transmitter, press and hold the M button until the channel display flashes.
- Hold the switched-on receiver (switch set to ON, not LOCK) near the transmitter, no further than about five metres away.
- The receiver adopts the transmitter’s channel.
- Briefly press the M button on the transmitter to finish.
Translation into several languages
For translation, each language gets its own transmitter on its own channel, for example channel 1 for French and channel 2 for English. The interpreter speaks quietly into the headset, and the listeners select the channel of their language on the receiver. Anyone who understands the original language does not need a receiver.
Tip: write the channels in large letters on a sheet of paper at the entrance, for example “Channel 1 Français, Channel 2 English”. More on this on the page Interpretation equipment rental.
Range and battery
- Up to 150 m range outdoors
- 999 channels for several groups
- Transmitter battery about 18 hours
- Receiver battery about 80 hours
- About 100 g per device
- Radio on 2.4 GHz, no licence needed
The range of up to 150 metres applies outdoors with a clear line of sight. Inside buildings, through walls and in large crowds it is shorter. It is best to stay within sight of your group. If a receiver finds no signal for ten minutes, it switches itself off to save the battery.
For an event lasting several days, put the transmitters in the charging case overnight and plug the case into the mains. The receivers last several days without charging.
If something does not work
| What happens | What helps |
|---|---|
| No sound | Are transmitter and receiver switched on and on the same channel? Is the transmitter muted (symbol on the display)? Are the headphones plugged in all the way? Turn up the volume with VOL+. |
| Receiver is suddenly off | It switches itself off after ten minutes without a signal. Just switch it back on. |
| Hissing or dropouts | The antenna symbol flashes when the signal is weak. Move closer to the person with the transmitter. |
| You hear another group | Both groups are on the same channel. Set one transmitter to a different channel and set that group’s receivers again using the M button. |
| Buttons do not respond | The switch is on LOCK. Slide it to ON. |
| Battery symbol is almost empty | Charge the device in the charging case plugged into the mains, ideally overnight. |
If you are stuck, write to us at info@event-solution.ch.
After the event
- Switch off all devices (switch to OFF).
- Put every device in its slot in the charging case, together with the headphones, headset and lapel microphone.
- Check that every slot is filled, then close the case.
- If shipped: stick on the return label and hand in the parcel at the post office by the “Post it back by” date. If picked up: bring everything back to Zollikofen by the “Bring it back by” date.
You do not need to clean anything, we do that. The rental terms set out what applies to late returns, damage or loss.
Ready for your event?
Getting your price takes less than two minutes.